[Guide] Custom Smiles - For Ultimate subscribers and upgrade option
Admin > Ad Free & Upgrades - Purchase Custom Smiles Upgrade
In this guide you will learn how to add custom smiles to your forum.
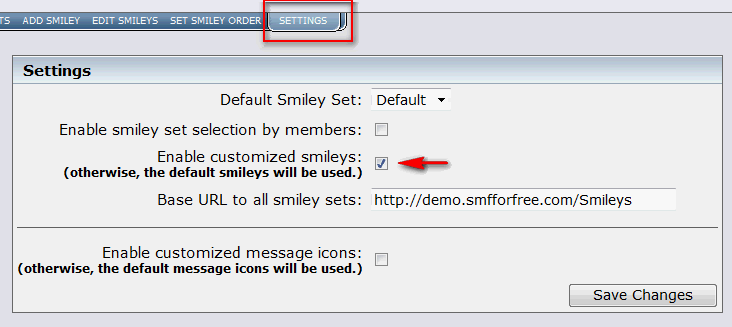
Go to Admin > Smileys and Message Icons
Step 1: a: Put a Checkmark in: Enable Customized Smileys
b. If you previously used a Photobucket Account as the Base Url for the smileys on your forum or if you used the url for the smileys you see here at the Support forum, you will need to return the Url back to Default. If you used the smf smileys also delete the smf smiley set on the Settings page. If you did neither click "Save Changes" and move on to Step 2.
To put the Base Url Back to Default:
In "Base URL to all smiley sets": Use
http://text.smfforfree.com/Smileys NOTE Replace text.smfforfree.com with YOUR forums url.
Click "Save Changes".
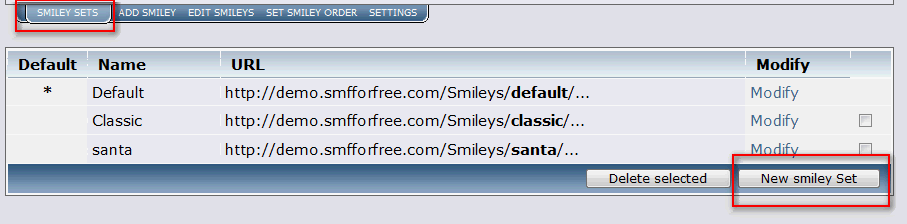
 Step 2
 Click "Smiley Sets"
In Smiley Sets click on the "New Smiley Set" Button
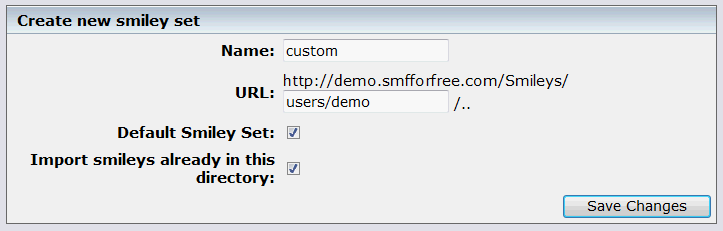
 Step 3
 You can call the name of your smiley set what ever you want.
Just two things are important.
1. First make sure that default smiley set is checked.
2. Last And most important of all make sure the url is
users/yoursubdomainnamehereFor example If your url is
http://demo.smfforfree.com Then your subdomain would be "demo"
You would use
users/demo as the smiley set url.
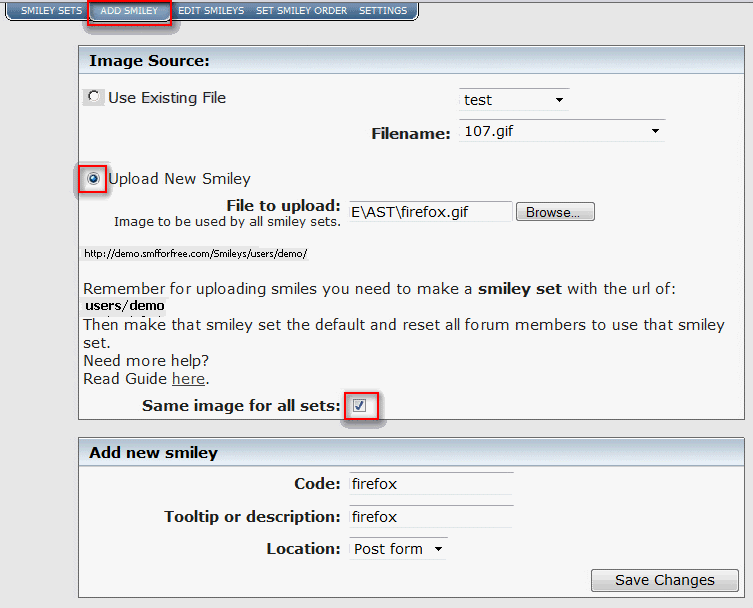
 Step 4
 After you created your smiley set it is time to upload smilies.
First click on "Add Smiley" menu link on the page.
Now make sure that "Upload New Smiley" is selected.
Next browse for a smiley image on your computer.
Make sure that same image for all smiley sets is selected.
Enter the smiley code you wish to use for the image and make a short description and where you want the image to show.
Then click the "Save Changes" button.
[
The first time you upload a new smiley it will copy over the images from the default smiley set.
Step 5 Almost done! This is the last step:
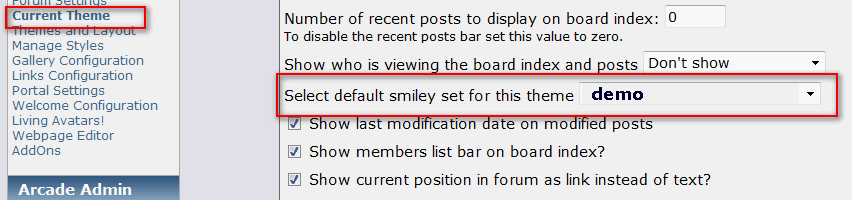
Go to Admin > Current Theme
Choose the name of the smiley set you created.
You are now finished and can enjoy using custom smiles on your forum.
Enjoy,
SMF For Free


 Topic: [Guide] Custom Smiles - Upgrade Option (Read 58111 times)


